Sunshine, increasing temperatures, warm rain showers, and the return of migratory birds are all signs that Spring is getting closer. They are all reasons to be excited about Spring and all the possibilities that the new gardening season will hold.
It’s always tempting to go out and start sowing seeds at the first glimpse of sunshine, but most seasoned gardeners know that patience is the best policy. It takes several weeks of warm air temperatures and sunshine for the soil temperature to get warm enough to signal the seeds to germinate. Mother nature provides mechanisms to protect seeds from germinating too early (called “seed dormancy”) and there are certain requirements that must be met before sprouting occurs.
Did you know that every seed has an optimum range of soil temperatures for germination? This factor helps determine which seeds are cool-season versus warm-season. Penn State Extension has a great article regarding Soil Temperature and Seed Germination that you should spend a few minutes reading.
Our food-growing spaces allow us to grow healthy produce, connect with Nature, and hopefully save money. They are also a solid response to climate change and COVID.
My blog articles this year will be about climate-resilient food gardening. Each month I’ll address one or more aspects of how climate change is affecting our food gardens and changes we can make to reduce global warming and ensure a future of healthy harvests.
HGIC has a new Climate-Resilient Gardening section (thanks to Christa Carignan!) where you’ll find more information on these topics. We plan to continually update content and add new pages. And please check out the University of Maryland Extension’s new Healthy Garden, Healthy You project that connects food gardening and human health.
This first installment includes an overview of how our mid-Atlantic climate is changing and a look at heat-tolerant crops and cultivars. Future articles will explore low-dig soil prep, composting food scraps, peat alternatives, heat stress in plants, reducing plastics, and “hardening” our garden spaces.
Resiliency is mentioned a lot with respect to climate change. A climate-resilient garden can both withstand and recover from warmer, more extreme weather. Resiliency can also mean transforming how we grow food by creating and sharing a community knowledgebase of new ideas and techniques.
It’s seed catalog season! If you’re anything like me, you’re paging through them right now marking possible purchases for the 2022 growing season. (Happy New Year, by the way.) On my first pass, I always mark much more than I can plant in my own gardening space, and now that I’m no longer choosing what to grow in the Derwood Demo Garden, my selections are further limited. I have to make sensible choices, darn it. Nothing too big or aggressive, or that takes too long to produce, or is marginal in our climate, or that I’m not sure I like to eat. Good thing I’ve had all that practice trying and failing.
Now, I would never limit anyone else’s choices, or tell them they won’t succeed at what they’re attempting. I’m usually all for stretching the boundaries. So the spirit of the list below is not to discourage; it’s just to pass on what hasn’t worked for me. Maybe some of these plants have done great for you, or you’re convinced you can get past the challenges. But if your space and time is limited and you have to be realistic, feel free to make use of my what-not-to-grow advice.
Most of us plan our gardens each year with abundant annual vegetables to harvest and enjoy. There are, however, several perennial vegetables you may want to consider adding to the mix, some familiar and others, perhaps, less so.
Perennial vegetables have some attractive benefits: they tend to be low maintenance, are generally easy to cultivate, high-yielding, and often more pest and disease resistant than their annual brethren. On the downside, they can be slow to establish and, if they do succumb to disease, will often need to be removed.
One critical consideration in planting perennial vegetables is location. These are perennials and once established some will not be easy to relocate or, as in the case of sunchokes, to eradicate, so site them thoughtfully. And be certain to clear away any perennial weeds before planting.
Following are just a few selections for Maryland, ones I have personal experience growing. The most comprehensive and enlightening reference by far is Eric Toensmeier’s Perennial Vegetables (2007, Chelsea Green Publishing), which offers a fascinating window into the many options available for our area.
Rhubarb (Rheum rhabarbarum)
Yes, rhubarb is a vegetable although we use it more like a fruit, sweetened in pies and sauces. (An annual rhubarb crisp endeared my neighbors to me!) It is the stalks we cut and use as the leaves and even though much of the flower heads are toxic to people and animals.
Root crowns should be sited in full sun with ample space (plant 3 feet apart) as the clumps can grow to be 3-5 feet wide. Rhubarb really prefers cold climates and our Zone 7 is about as far south as it will grow happily. A heavy feeder, it is good to provide extra nutrients with compost annually. Once mature, the attractive large-leafed clumps can be divided for propagation, which should be done every few years to re-energize the plant. Two or three plants will keep you in pies (but try it in savory stews and soups, too). Some growers recommend removing the showy flower stalks once they open. To harvest, twist or cut the stalk at the base and be certain to remove all of the leaves. Rhubarb will die to the ground in winter and in early spring you will see its lovely red buds swelling up from the earth. And you will know it is spring!
Ramps (Allium tricoccum)
Here it is, an easy-to-grow shade-loving vegetable that also happens to be delicious! Often referred to as wild leeks, ramps are native to eastern and central North America. These early spring bulbs have wide leaves compared to most onions, growing to about 10” long. They die back with the coming of summer.
Ramps are found in the wild in moist deciduous forests. They prefer rich, moist soil, much like woodland humus, and form small clumps that can slowly spread to form large colonies. Harvest the whole plant leaving some bulbs for next year, or simply harvest some leaves. The smallish bulbs are like onions or garlic, the leaves like scallions or leeks.
Ramps are being over-harvested in the wild. This is yet another good reason to start your own colony (and move some into that forested land nearby).
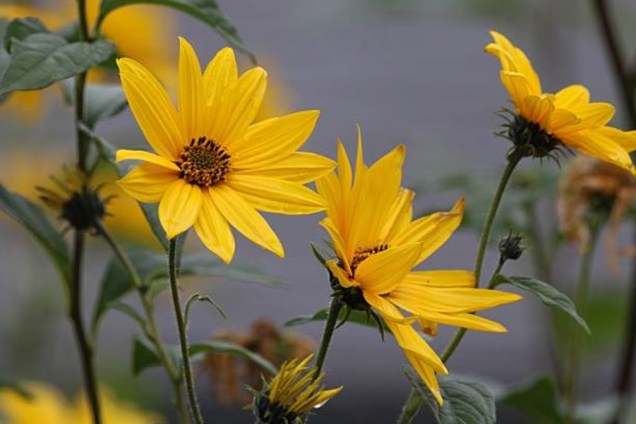
Sunchoke (Helianthus tuberosus)
Also known as Jerusalem artichoke (although neither an artichoke or from Jerusalem, go figure). These edible tubers are native to northeastern North America. Sunchokes grow 6-10 feet tall with cheery sunflower-like blooms in full sun or light shade. If sited in a wind prone area they will need support, or you can prune them back by a third to encourage bushier growth.
Sunchokes are very productive. Some varieties have knobby tubers while others are smoother (and easier to clean). They are sweet to the taste and rather nutty when roasted. Anything you can do with potatoes you can probably do with sunchokes. Harvest annually leaving some pieces of tubers with eyes 1-3 feet apart for next year’s crop. The flavor is best after a hard frost. A word about inulin: sunchoke tubers are high in inulin, a type of starch, which is not digestible by humans and can cause gas. Some people do not tolerate it well. Inulin does increase the ability to absorb calcium.
Here is where caution is required! Left to their own devices sunchokes will form large colonies – they are best treated like a mint using containing methods. I grew mine in a large raised bed and they gave me more tubers than I could use and a glorious mass of tall yellow flowers.
Cardoons (Cynara cardunculus)
Found in the wild all along the Mediterranean, cardoons are more popular as a food crop in Southern Europe and North Africa where they are native. They are related to globe artichokes but are grown for the edible stalks rather than the flower heads, which taste like artichokes and are used like celery. Their dramatic spiny silvery foliage and beautiful thistle-like flowers, however, have earned them a place in many gardens. Perhaps as architectural interest in a border? Bonus: Deer won’t touch them.
Cardoons do best in full sun and well-drained soil, although they tolerate some light shade. Start them from seed 6-8 weeks before the last frost and transplant them after the last frost date. The first year they can grow 3-5 feet tall and 3 feet wide, so plan some space. Plants have about a five-year productive life span. They can be divided in spring.
For eating, the stalks are usually blanched (protected from sunlight), to make them more tender and easier to cook, in the fall. This is done by tying the plant into a bundle and wrapping it with cardboard or newspaper to 18 inches then leaving it alone for a month. Hill up the soil around the stems. Cut the stalks off at ground level. Alternatively, you can harvest just some of the fleshy leaf stalks. Clean the leafy bits from the stalk (it will look like a celery stalk), peel away the outer skin, and parboil them before using them in recipes to mitigate any bitterness.
Asparagus (Asparagus officinalis)
Last on this list but probably the most widely known and loved perennial vegetable: asparagus. This edible shoot is a native of Eurasia but has naturalized throughout North America.
Asparagus can live for 15 years and longer, so situate it thoughtfully. (I well remember helping my dad pull out an ancient asparagus bed as a kid. Suffice to say it involved a tractor and chains.) It requires full sun and good drainage. Annual applications of compost or well-rotted manure keep it productive and plentiful water all season will keep it happy. It is easy to grow from seed but generally, year-old rooted crowns are planted in early spring to speed the time to harvest. Plant them 15-18 inches apart in wide beds or rows, with 4-5 feet between rows. All male varieties will not seed (females have berries) and tend to be more productive and disease-resistant. A broad selection of asparagus is available including lovely purple varieties (white spears are blanched).
Spears develop from the underground crowns in early spring. Do not harvest at all in year one and harvest lightly in years two and three. Spears should be snapped off or cut at 6-8 inches. After 8-10 weeks let the spears grow. They will form a lovely, tall, fern-like frond. After frost, the foliage will turn yellow, and at that point, it can be cut down to 2 inches. Asparagus can have a number of pests and diseases. Purchase resistant varieties, keep patches weeded and remove all foliage after frost for best prevention.
These are but a few of the interesting options available to you!
Two of the vegetable crops I grew this year are known for loving the heat: okra and eggplant. I grow eggplant in pots on my deck, to avoid flea beetle infestation, and okra directly in the ground in my community garden plot. Both of them produced adequately over the summer. Now it’s fall; we’re having days in the 70s and nights in the 50s, and there are fewer hours of sunlight in the day. Time to pull the summer crops, right?
Except – boom! Both the okra and the eggplant are going gangbusters. More flowers, more fruits than in the hot summer months, by far.
‘Bride’ eggplant on a cool autumn morning
So why aren’t these plants following the rulebook? Do they not know how to read? Or have the rules changed?
I think it is safe to say that it is officially tomato season in Maryland! For people that do not grow their own tomatoes, many visit local farmers markets, roadside stands, or grocery stores to purchase these delicious treats. How are you getting your tomato fix in 2021? Do you have a favorite tomato variety you grow at home?
Soil type and growing conditions such as temperature and amount of available water can influence the taste, sweetness, and texture of a tomato, but there is some background information that can help guide your tomato buying or growing. My family and I grow 10+ different varieties and anywhere between 150-200 tomato plants each year for our small, fresh vegetable business. I want to share some lessons with you that I have learned.
Below are some basic terms to know (for a more detailed explanation of these check out this blog post). I’m going to make some generalizations about the terms when it comes to characteristics that people are looking for in eating qualities:
Variety– there are hundreds of varieties of tomatoes. Each variety has a special characteristic that makes it different from another variety — shape, size, color, taste, etc. Varieties can be open- pollinated, heirloom, or hybrid. These terms relate to how the seeds are produced season after season and are important if you want to save seeds in your garden.
In some situations, especially in greenhouses, growers will utilize bumblebees to ensure that pollination happens; however, cross-pollination is not needed for tomatoes, as they are self-fertile (a complete flower with both male and female parts, so just the motion of the flower opening is usually enough movement for pollination to occur). In nature, wind and rain help tomato pollination to occur. In my high tunnel, we shake our vines every few days.
Open-pollinated plants have been crossed in nature by insects, wind, rain etc., several times and most variability has been lost through natural selection and natural crossing. These often breed “true” to name and characteristics. However, these plants are more likely to produce fruits that have deformities like catfacing.
Heirloom is a special designation of open-pollinated plants that are 50+ years old and often have a fun story that goes along with the name. They may have some variability in size, shape, and color, but are usually pretty standard. Heirlooms/Open-Pollinated varieties are often softer, thinner skinned, get more bruises from handling, and are harder to pick/pull off the vines. My favorite heirloom and story is about the Mortgage Lifter, which was bred in West Virginia by a mechanic that was so successful that he ended up growing plants and selling them to pay for his mortgage in just 6 years.
Hybrid variety Early Girl (bottom row)A hybrid greenhouse variety called RebelskiBigdena greenhouse tomato
Hybrid or F1 generation seeds are the result of a specific cross of two parent plants. The hybrids are often bred for a specific outcome such as disease resistance, color, or use. Often these tomatoes are very uniform in shape, size, and color when ripe. Many times hybrid tomatoes are more “sturdy” tomatoes– not as soft and will hold up better on the shelf. Often, the more ripe these tomatoes are, the less thick the skin appears and the sweeter they taste.
In my opinion, if you choose accordingly, every tomato has a perfect use.
For salads, I like a tougher-skinned tomato, so I choose a hybrid. Who wants a tomato that gets all over the other vegetables in the salad? Also, if someone in your family doesn’t like tomatoes, these types are easier to pick out.
Making juice, sauce, salsa, or anything that you want to be thicker– heirlooms, hybrids, or paste tomatoes (sometimes a mixture of all work the best)– any type will work but a longer cooking time may be required to get the correct thickness.
Eating fresh on a sandwich– heirlooms often have the best flavor and texture, but if overly ripe, they tend to be a little mushy. Hybrids will work well, especially if you let them get fully ripe!
Sometimes people use overall shape to categorize tomatoes, but the shape doesn’t always fully describe the tomato.
Beefsteak- is a particular variety name, but many people also use this term to describe a large tomato. Sometimes these varieties have a core that isn’t edible.
Slicing- describes a large tomato often used to cut across and make a nice slice, often important to people that want to eat a fresh tomato sandwich.
Cherry- very small tomato, eating in one bite without cutting.
Pear- small pear-shaped tomato, often eaten whole, much like a cherry.
Grape- similar to a cherry, but usually smaller in size.
Oxheart- tomatoes shaped like a heart that often have a large core that is not usable.
Paste- oval to pear-shaped tomatoes that are meaty with fewer seeds. They tend to have less juice and are preferred for drying, canning, or sauce.
Several yellow oxhearts are pictured above. This is a variety called Homer Fike Yellow Oxheart, from my hometown.
Skin thickness is a very important characteristic!
Hybrids often have tougher or thicker skin, which makes them easier for picking and handling in mass production. If you like to squeeze tomatoes to check for ripeness a thicker skinned variety can be misleading in how tasty or ripe a tomato is.
Knowing the characteristics for each variety can be really helpful in determining ripeness.
For example, we grow several types that are pink when fully ripe. But if we do not mark where these are planted it is easy to leave them on the vine too long and they get overly ripe and then are not marketable. Likewise, if you are shopping for tomatoes and do not realize that there are pink varieties, you could be missing out on a very tasty treat!
Oxheart Tomatoes– Top left— washed, Top right– cleaned, boiled and ready to peel the skins, Bottom Right- cooking with salsa packet mix added, Bottom left— Salsa in pints and processed in a water bath canner. Another heirloom tomato– Mr. Stripey. If you are looking for a yellow tomato with a red marble that will grow huge, try this variety! As you can see from the photo, the tomatoes are way larger than my mother’s outstretched hand. Mixture of hybrid tomatoes– Fourth of July (a great salad tomato, perfect for cutting into quarters) and Early GirlPurple hybrid tomato called Marnouar which has eating characteristics similar to an heirloom but a disease resistant package that I could not resist!
Knowledge is power when it comes to choosing the best tomato for your purpose! Please, on behalf of gardeners and fresh vegetable growers everywhere, do not squeeze the tomatoes to test for ripeness! Take a chance and try some different varieties this season and next!
By Ashley Bodkins, Senior Agent Associate and Master Gardener Coordinator, Garrett County, Maryland. See more posts by Ashley.
In the bottom two middle squares of my raised bed garden, the spinach and leaf lettuce is growing from last month, but now it appears like there are some unwanted plants as well — weeds! In just a few short weeks, our garden has been overtaken by weeds. The weed seeds came from the topsoil I purchased. Weeds are a problem when you have a garden of any size, unless you use new, sterile, soilless growing media each season. Knowing what you planted will really be important so you can be on the lookout for the seedlings, and remove just the weeds.
Seedling leaves (cotyledons) often look completely different from the first true leaves that come out later. One characteristic that can help you in figuring out if you have a weed or a plant you want to grow is by looking at the number of leaves that sprout from the seed. If the plant has one seedling leaf, it is called a monocot (monocotyledon). This includes plants like onions, corn, and grasses. If the plant has two seedling leaves at germination, it is called a dicot (dicotyledons) and includes plants like tomatoes, beans, potatoes, spinach, and lettuce. Dicots are sometimes referred to as broadleaf plants. Many times selective herbicides work on either monocots or dicots but not both types of plants; that’s what determines which plant will be killed by the herbicide or which will be resistant. Non-selective herbicides will kill both monocot and dicot plants.
Sometimes people get really upset when I call a plant a “weed.” Please remember that many plants can be designated as weeds. The simple definition is “a plant growing where it is not wanted.” So even though weeds can have desirable characteristics, when it is a plant growing where it is not wanted, it is a weed. Weeds compete for sunshine, water, space, and nutrients in the garden, and some can be hosts for diseases and pests.
As with most gardening tasks, addressing the problem early and often is the best advice. Being able to identify weeds when they are small is one of the skills that I continue to hone each growing season and it takes practice and time. Knowing what you planted and where you planted it is the first step in knowing what may or may not be growing. Virginia Tech has a nice identification guide that lets you answer questions about the specimen and points you to a possible answer.
Left: Grass seedling, an example of a monocot. Right: Ragweed seedling, an example of dicot.
Examples of dicot weeds. Left: Lambsquarter (larger and smaller stages). Right: Smartweed (see the thumbprint in the center of the leaves).
I will be using mechanical control methods (hand pulling or a small hand shovel to remove the weeds) because it’s such a small area.
In our commercial high tunnel operation, we use a physical barrier as our first line of defense in weed control. Wind can cause hardships with keeping landscape fabric held in place, but we use 6-8’’ long landscape pins to hold it down.
The left photo shows damage as it appeared the morning after the frost. Right: shows what the damage looks like a week later. It hasn’t killed the plants, but they will be set back from the frost.
We have had some very chilly night temperatures which is not too uncommon here in the mountains. Our expected frost-free date is June 5th, so I’m looking forward to putting in some warm season vegetables in the coming weeks — tomatoes, peppers, green beans, and maybe a summer squash are on our list.
Weeded garden bed
By Ashley Bodkins, Senior Agent Associate and Master Gardener Coordinator, Garrett County, Maryland, edited by Christa Carignan, Coordinator, Home & Garden Information Center, University of Maryland Extension. See more posts by Ashley and Christa.