Every time we plant a seed or baby plant in our vegetable garden we are hoping for the best outcome- a healthy crop and big harvest. Gardening success comes from learning about the needs of our crops and doing all we can to meet those needs. Climate change is causing us to think a little more deeply and holistically about those plant needs and our gardening practices.
In addition to making sure that plants have enough space, water, and healthy soil, we can alter how and where we plant our crops (“comfy places”) to help them adapt to increasing summer temperatures. We can also consider ways to expand or shift our food garden spots (“new spaces”) to better manage growing conditions and produce more food.
Hello again! Last year, I published a series of blogs chronicling my 2020 growing season from the perspective of a “semi-novice gardener.” Some things went well, some things did not, and I learned a lot in the process, thus I am upgrading my gardener status to “intermediate!”
This year, I will share my work with the class again, but with a focus on certain challenges I encountered last year and what I am doing to do better this time.
Seed starting
For starters, my wife Krysten decided to try seed-starting this year. We set up a grow station on a shelf in the basement with a grow light. I used a smart outlet to power the lights and programmed it to turn on at sunrise and off at sunset. Krysten even pointed a fan at the seedlings, as she read that it simulates a breeze and helps them grow stronger than if they grew without any breeze pushing on them. We started Tomatoes and squash. This was Krysten’s department, so I don’t have a ton of details to share, but we got a ton of tomato, cucumber, and squash seedlings out of it.
Seedlings growing stronger in the indoor breeze.
We had a cubic yard of compost delivered (along with mulch and soil for other projects) and added that to the previous year’s soil in the raised beds.
Our overall plans and goals
Like last year, we are growing:
Tomatoes
Squash
Cucumbers
Green beans
Corn
Unlike last year, we are attempting strawberries and tromboncino squash. Tromboncinos are purportedly squash vine-borer resistant (a big issue for our squash in the past), easy to grow, and I thought it would be fun to have high-hanging vegetables.
Like last year, we have several pollinator-attracting plants in the garden, but this time, we are keeping them in pots and not planted in the raised beds with the vegetables since we had issues with overcrowding last year. We’ve got cone flowers, milkweed, marigold, lilac, zinnia, and dahlias around the perimeter.
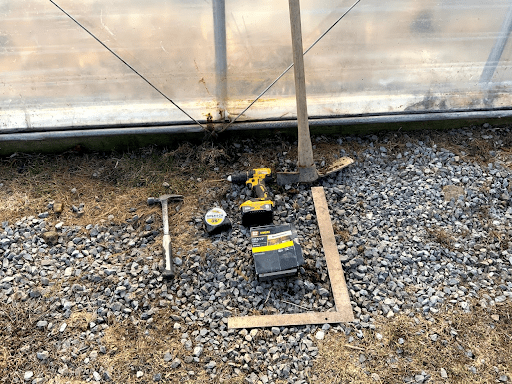
We are upping our security from munching mammals such as deer and rabbits. Pictured at the top of this page, we still have the low rabbit fence as last year, but we are going to build a high fence to keep out deer JUST around the bed with the corn. I thought this would be much easier than creating a high fence around the whole garden area like in this video.
We are taking steps to stop squash vine borers from killing our squash plants mid-season, and that will be detailed in a future blog post.
I’ve built a big support structure for the tromboncino squash; it is the big triangular ladder structure you see in the photo. I am planning on some different structures to support tomatoes as well, and I will detail my construction projects in a future post.
One notable item
Before I sign off, I thought I’d share one interesting issue I discovered with my tomatoes:
Adventitious roots on tomato stems
I found these weird white growths on the stems of my tomatoes last week. I sent in this picture in to the horticultural consultants at Ask Extension (you can too!) for identification. They answered:
Those are adventitious roots along the stems. See this page on the HGIC website. Some heirloom varieties of tomato tend to produce these roots, which would grow into normal roots if placed in contact with the soil. In some cases, adventitious roots are a reaction to a stressor (too much water/poor drainage, high nitrogen, even exposure to herbicides). There is nothing you need to do other than consider if the plant was under a period of stress and then improve the conditions, if possible. For example, if the plant was growing in a pot with poor drainage, if you move that plant into the ground with good soil conditions, those roots will develop into normal ones to support the plant (assuming the plant is otherwise healthy, no disease issues).
This particular tomato plant is in a pot. It may have been over-watered, and it had also been humid and rainy in the last few days. It’s good to know it isn’t a big deal. We’ll just watch out how much we water that one.
Stay tuned! My next update will likely be about all the construction projects I’m wrapping up as I write this post. I’ve got the big triangle trellis, tomato suspension supports, row cover support, a new garden gate, and deer fencing around one bed.
The snow is finally melting here in Garrett County and spring is getting warmer every day.
My husband, Josh, had a few hours to help me build our new raised bed on Saturday. Some of you may have read my planning and budgeting blog from last month, but my building materials have changed. Josh found a yellow locust tree to cut into logs, which we sawed on our family’s circular sawmill. Be sure to check local feed stores, garden centers, or local sawmills for wooden building materials that may be very affordable.
Level the area. You will need a shovel and a level. Measure out the dimensions of your raised bed. We had to dig deeper on the one side to make it level. We also used a 4-foot long level, so that made measuring the 8’ x 4’ bed pretty easy to lay out.
Prepare your boards. Square the ends and cut. Pre-drill after cutting the lengths. Pre-drilling is especially important if you’re using hardwood lumber. We used 1.5 inch thick locust lumber.
Lay out your boards and nail them together. Check out this video by Jon Traunfeld (1 minute 30 second mark) for more details on how to nail the boards together. Repeat until your desired height or you run out of materials. Measure diagonally from one end to the other. Those numbers should match if the bed is square.
We added two middle posts that we drove one foot into the ground to be sure that the soil wouldn’t push the boards out of place. Posts were 3” x 4” and 3 feet long.
Secure your layers together.
Add black landscape fabric (or newspaper/cardboard) to block weed growth. This photo shows all posts that were used to secure the three layers of boards.
We used a mixture of bulk topsoil and mushroom compost purchased from a local feed store. Here you can find more information on what you can use to fill your raised bed garden.
Lastly, I used staples, a hammer, twine, and a rule to measure out my square foot plots to prepare for planting. I have 32 square feet ready to plant as soon as the weather warms up a little more. Check out these great resources if you need guidance on timing of when to start planting vegetables. This planting calendar is my favorite planning tool. Next month, I’ll share some ideas for critter-proofing the raised bed.
Are you ready for vegetable gardening season? Do you have plans to add any gardening spaces this season?
By Ashley Bodkins, Senior Agent Associate and Master Gardener Coordinator, Garrett County, Maryland, edited by Christa Carignan, Coordinator, Home & Garden Information Center, University of Maryland Extension. See more posts by Ashley and Christa.
Even though it is snowing again today, I am dreaming of gardening season and I am working on a budget for a new raised bed garden that will be 8’ x 4’ x 12”. I have always grown vegetables in a traditional in-ground garden, which only requires some tools for preparing the soil, soil amendments, and a suitable location (full sun with good soil). However, I want the advantages of a raised bed:
earlier soil warming;
more focused usage of growing space (through succession planting and square foot gardening techniques);
less body bending to plant, maintain, and harvest; and
getting to plant cole crops sooner (with my in-ground garden, I have to wait until late May for the ground to be unfrozen and dry enough to run the the tractor tiller).
Raised bed made from grapevines and a plastic liner.
A lot of inspiration can be found on the internet for building materials, but think about materials that you may already have on hand or something you can find freely or cheaply. More information on raised beds can be found on the University of Maryland Extension website.
Some things to keep in mind:
Natural materials (stones, logs, untreated lumber, cement blocks, sawmill slabs, bricks, etc.) are safe, affordable, and often can be scavenged/repurposed if you aren’t afraid to ask or do some physical labor.
What is your skill set? Maybe you can work out a trade with someone who can help you build the raised bed.
Any time you can buy items in bulk, you will save money.
After doing some research, I plan to purchase new pine lumber from a local box store (easy to find and within my budget). Pine or softwood lumber should last anywhere from 3-5 years. Using commonly available sizes/dimensions, I will be spending approximately $80 (if it lasts 3 years, that’s $27 a year). Cedar boards would cost double the money but they could last closer to 15 years (cedar was out of stock in a lot of locations I checked).
Most stores that sell lumber will cut the lumber for no extra fee. It is sometimes cheaper to buy a longer board and have it cut into smaller pieces for transport. Be sure to plan ahead.
The most expensive part of creating this garden will be the topsoil, since I don’t have any extra in my landscape to use. The soil is an investment and will be a resource that I can use for many years to come to produce nutritious fruits and vegetables.
I used a free cubic feet calculator to figure out an estimate of how much soil I will have to purchase for my 8’ x 4’ x 12” garden. See the calculations below.
Soil is expensive and hard to transport and handle. I am prepared to do this step over the course of several days or have some people help me. Bagged topsoil usually isn’t the best quality and can add a lot of expense, but the source can be traced if any issue should arise, and also gives anyone with access to any vehicle type/transportation the ability to create a garden. Bulk topsoil and compost is usually sold by the ton or cubic yard, so the free calculators are helpful for figuring out amounts needed. Soil testing is recommended for raised bed gardens.
Soil Type
Price
Bagged Topsoil (43 bags of 0.75 cu foot)
$110
2/3 bagged topsoil, 1/3 bagged compost (45 bags)
$145
Bulk topsoil/compost
$65
The bottom line is that the raised bed could cost up to $225 depending on which option I use for soil. Using bagged soil/compost mixed ($145 + $80 lumber) is going to cost the most $225. If I use the bulk topsoil/compost option and use my own farm truck to haul it, it’s only $145. I’ve also budgeted an additional $40 for a 7ft deer fence and landscape fabric. For my family of 4, I am willing to count this raised bed garden as a worthwhile investment of time and money.
By Ashley Bodkins, Senior Agent Associate and Master Gardener Coordinator, Garrett County, Maryland, edited by Christa Carignan, Coordinator, Home & Garden Information Center, University of Maryland Extension. See more posts by Ashley and Christa.
And thus concludes my most ambitious growing season yet. I learned a lot, got a decent amount of vegetables to eat, got some exercise and building experience, and had a few challenges. For this final post, I will do a quick recap of what I learned and how I might approach my gardening next year.
Since my last post, we basically became lazy and gave up on the garden. No more maintenance was done, certain plants were being eaten by critters that can hop our fence (deer, likely), weeds were growing, and we mostly didn’t even water it. Our tomato plants began looking pretty unruly and sad but somehow were still producing quite a few fruits (albeit with cracks in them).
We did find some curious mushrooms in the garden at some point a few weeks ago.
Several mushrooms popped up
Even though our tomatoes were still producing, we had had our fill and were ready to be done with the garden. I pulled up all the plants, took down the supports, and disassembled our fence, as we will likely revise our garden defenses next year.
To protect our raised bed soil for the winter, I threw a layer of mulched leaves into the raised beds. I just raked some piles of leaves, drove my mower over them a couple of times, and scrooped them into the beds. According to this Maryland Grows blog post,
We can improve soil health in gardens and on farms by:
limiting soil disturbance (tillage)
planting a diversity of plant species
keeping soil covered throughout the year
These practices reduce erosion and nutrient run-off, build organic matter, and increase carbon storage in soils which helps mitigate the effects of climate change.
We had considered growing a living cover of crimson clover, but we would have had to plant it much earlier and our garden hadn’t quit producing yet.
Things we learned or will try to do differently next time
We want to be more vigilant in protecting squash from vine borers. We’ll likely follow these tips from our blog post:
You can prevent flying adults from laying eggs on your plants in May and June one of three ways. Wrap a collar of aluminum foil around the lower stems. Dust or spray with spinosad or pyrethrum. Or, cover your plants with floating row covers until they flower.
I need to both provide better support for my tomatoes earlier and work harder at pruning them regularly. My plants became way too voluminous and flopped over often before (and after) I had sufficient support built. I had some basic cages and then makeshift boards with twine strung across them, but I will likely build something more ambitious next year, and earlier.
Overgrown tomato plants
We wanted to make sure we had flowers near our crops to attract pollinators, so we planted ornamentals in the raised beds. However, some plants crowded others, and since we now have the rest of our garden path and enclosure, next year we will just plant some flowers in pots nearby.
We are going to increase our garden defenses next year. I believe our short fence worked well for short animals, but eventually deer got the memo about the tasty stuff in the garden and easily hopped the fence. We are going to consider augmenting our short fence with tall fishing line fencing, or perhaps just create PVC frame row covers just for certain vulnerable plants.
Final thoughts
I had a lot of fun sharing these updates with the blog, and it also pushed me to do better and stay focused. I’m looking forward to using these experiences to do a better job next year! I also found a ton of useful information on the HGIC website and hope that I was able to point out the breadth of information at your fingertips available on our site.
I’m looking forward vegetable gardening next year and possibly sharing the process again!
Here’s update #4 on my raised bed garden efforts this year. While we are enjoying eating our vegetables, some other creatures are as well. As our summer crops are winding down, we are starting some light fall vegetable crops, and planning to prepare the other beds for the winter.
Critters are back
Last time, we had corn coming up in one bed. It looked like we’d eventually have little corn cobs to pick, but soon after we took the picture below, something came in and ate the entire crop!
Mini corns before decimation
Something ate our corn
The same night our green bean crop, which was providing lots of beans for our dinners, was eaten as well.
Green bean harvest
Green bean leaves eaten
That’s pretty much the end of both crops. We got a lot out of our green beans, so that was not a big loss, but we are sad that we didn’t get to see what the corn was like eventually.
Since we think our short fence is pretty solid, we are assuming this was deer coming in to eat the crops. Next year, better deer protection is definitely on the menu. We’ll look into either floating row cover or building a bigger fence to keep out the deer.
Interesting insects
This doesn’t have much to do with our vegetables, but we have a potted butterfly milkweed plant placed just inside the fencing, and it was a host to a bunch of insect activity.
We found a couple big, juicy monarch caterpillars hanging out munching on its leaves, and at the same time, a whole crew of orange aphids were sucking sap out of the stem. A few days later, all the leaves were gone off the plant.
Monarch caterpillar on milkweed
Monarch caterpillar and aphids on milkweed
Orange aphids on milkweed stem
Eaten milkweed
We began to have to check our green beans for caterpillars. We’d occasionally find these little guys or their holes in the beans. We think it is a young armyworm caterpillar. The problem wasn’t enough to do anything about — just an entertaining mention.
Caterpillar eating my green bean!
In this action-packed scene below, we have a tomato hornworm hanging out on my tomato plant while being a parasitized host for Braconid wasps, while a tomato fruitworm lounges above with a fly on top of it.
Powdery mildew and insect stippling on our ornamentals
Our zinnia and marigolds got these white spots all over. At first, I suspected this was powdery mildew on both due to their close proximity and both symptoms appearing white. However, my trusty, knowledgeable editors commented while reviewing this post that the issue on the marigolds was likely feeding damage from insects, but we don’t know what insects. As a reminder; you too can tap the knowledge of HGIC certified professional horticulturists via our free Ask an Expert service. Send in your questions!
The powdery mildew hasn’t transferred to the vegetable crops around them, so we haven’t been too concerned about it. The HGIC article on powdery mildew mentions that overcrowding of plants can create good conditions for mildew to grow due to the limited airflow. Our beds are definitely overcrowded. We’ll be spacing things out next year, and likely putting our ornamental pollinator attractors in pots outside of the raised beds.
Powdery mildew on zinnia
Feeding damage on marigold leaves
Tomato trimming
Overgrown tomato plants
We have been really learning that tomatoes are a crop that needs quite a bit of attending to. I should have been pruning suckers maybe every other day. The vines kept growing and growing, covering other plants and laying on the ground. Interior vegetation started browning and maybe getting moldy due to lack of airflow. There were green tomatoes growing, but it took them a while to ripen and be ready. I suspect my lack of pruning allowed the plant to use its energy to grow more vines rather than developing tasty tomatoes.
A few tomatoes on our orange tomato plant were on the vine for a LONG time and developed odd bulging characteristics.
Bulging tomatoes
Bulging tomato ripe off the vine
Look at this big boy
I went hard trimming both plants; cutting off a lot of branches that didn’t have fruit on them, or were growing on the ground. Fruit has seemed to come in faster and more plentiful since, but I need to keep pruning! This is easier and less traumatic for the plant (I would assume) if I just picked those little suckers early.
Trimmed tomato plant
Tomato trimming
Tomato trimmings
Trimmed tomato plant
As the season wears on, more and more of our tomatoes are getting cracking, but the fruits are mostly good to eat. The HGIC page says that this could be caused by excessive fertilizer, but we haven’t added anything to the soil. It mentions irregular watering could do it, and I suspect that may be the culprit. My wife and I have been in a perpetual, “Hey, you’ve been watering the garden these last few days, right?” “Uh, no, I thought you were” cycle recently. We’ll need to keep vigilant with our chores!
Tomato cracking
The future of this garden
So what’s next? We’ll see how long our tomatoes keep producing. Krysten planted a couple kale seeds and winter squash seeds that are coming up. We don’t have a grand plan for these, but we’ll see how they do.
Kale
Winter squash
For the rest of the beds, we will likely pull the leftover ornamentals and the tomatoes once done, and plant crimson clover cover crop. Cover crops lessen soil erosion during the winter, add organic material when turned under in the spring, improve soil quality, and add valuable nutrients. In the spring, we just mow it (in our case, in the raised beds, we will string trim it) to kill it, then later turn it over into the soil.
Hi all, I’m Dan Adler – a part-time employee that works on web and communications at the HGIC. I work on the website, video creation, posting others’ blog content, newsletters, design, and other web-media technical things. I’ve been with the HGIC for several years, but I came into the job with close to no gardening experience. Over the years, I’ve absorbed a certain amount of knowledge by osmosis in the office, but no one mistakes me as a subject-matter expert at the HGIC!
This growing season, I am going to record my raised bed vegetable garden exploits and post several in-progress reports here on the Maryland Grows blog. I hope to go through my thoughts about decisions we (myself and my wife Krysten) made, where I went to find answers from the HGIC, what worked, and what didn’t. Hopefully, this blog will help newer gardeners by acting as a bit of a case study on a fairly simple gardening project. Learn from what I do right, and what I do wrong.
This page on vegetable gardens on the HGIC website has been a good starting point and reference for information along the way.
The project
(This blog post is about a month late; we did the work mentioned here about a month previous to this post. Future blog posts will catch up and be closer to real-time as they happen).
We live in Baltimore County and have an area that gets full sun which is great for tomatoes and a lot of vegetables. Last year we bought a couple 4’x8′ raised bed kits from the hardware store. These are dead-simple to put together with no tools and get the job done for growing, but they are a bit thin and fragile after a while. At the time, we had calculated buying the kits vs materials to make a similar-sized (but a bit more robust) raised bed, and for us, they were similar. Two things we did to improve it, however, was to staple some chicken wire underneath so digging rodents couldn’t come through the bottom, and we set them down on cardboard to smother the grass underneath.
Picture of our yard area with old raised beds with weeds in them
We had some old soil in there from last year (with weeds in it) already, but this year, we topped it off with a bag of generic hardware store gardening soil in each 4’x4′ square after pulling the weeds. We definitely expect that we will have to continue pulling weeds.
What we should have done: (You’ll see this a lot moving forward.) Last year, when we were done growing, we should have protected our soil by either covering the soil with fallen leaves or leaf mulch in the fall, or planting cover crops that are easily mowed or string-trimmed away. This would have staved off weeds and kept more nutrients in our soil.
Let’s get planting
We’ve had some minor success with tomatoes, green beans, peppers, zucchini, and cucumber in the past, so we decided to do similar this year, but hopefully keep a better eye on them and build better support this year. Previously, we have had cucurbits get eaten by squash vine borers, and our cheapo cone-style tomato support didn’t hold up the plants very well as they got bigger and fuller than they should have (we did not prune diligently). We’ve also had issues with something eating up our green bean leaves; probably a groundhog.
We bought seedlings from the hardware store and a packet of green bean seeds, and planted them like the picture above.
Big plants like tomatoes and the cucurbits that need some space were planted diagonally from each other to maximize the distance.
The top-left and bottom-right bed squares are taller and have deeper soils, so the tomatoes were planted in those, as I am assuming they like to go deeper with their roots than our other crops.
The bean seeds were planted according to the package’s instructions: 3″ apart in rows, down about 1″ in the soil.
We intentionally left spaces in the center of the bean planting and elsewhere in our beds with the plan to add some flowers to bring in pollinators. Pollinators are essential for food crops, and attracting them is essential. Our area is in the middle of an ocean of grass, so we feel we need to incentivize these good bugs to visit a bit. Read this blog post on Pollinators and Food Gardens.
We watered every day and added the flowers the next weekend. The week after that, we have this shot:
The flowers we added were Zinnia and Marigold*. Krysten also snuck in a celery plant in the bottom right corner as well.
You can see all the vegetables are larger and the beans are coming up well. We are prepping for some renovation of the area around the garden as you can see, but I will talk about that later.
We have plans to create some fencing to keep rodents out, but that sort of depends on other renovation plans we have to happen first, so we are hoping at this point that the varmints don’t find the garden before we can get the defenses up.
As I’m writing this in hindsight, everything looks peachy and hopeful at this point in time about a month ago. However, we definitely hit some snags and added some more challenges ourselves pretty soon after this. Stay tuned, and I’ll fill you in shortly!